Add, Publish, and Delete Layouts
Overview
Layouts define the template to be used when a recommendation is returned for a placement. For a placement to return recommendations or content, it needs to have a layout associated to it.
This How-To assumes the user is familiar with the Algonomy Omnichannel Personalization dashboard and the concepts of recommendations, content, placements, and layouts.
Through this interface, you can:
-
Add, edit, and publish layouts.
-
Filter layouts that have been created for different types of personalized content (recommendations, promotions, etc.).
-
View associated placements for a given layout.
-
Set up layouts using the traditional layout editor or the new layout designer.
-
Compare the states of Integration vs. Production.
-
Publish settings in Integration to Production.
Adding Layouts
To create or modify a placement, go to the Omnichannel Personalization dashboard Site Configurations > Layouts.

You see a list of layouts, each with a drop-down arrow that shows the associated placements.

-
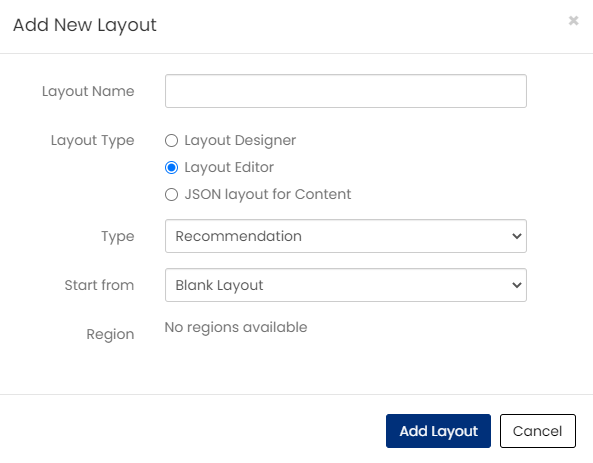
To create a new layout, click Add Layout.

-
Create a descriptive Layout Name.
-
Choose a Layout Type:
-
Layout Designer: a GUI that helps you design your layouts.
-
Layout Editor: an editor that gives you total control of your layout with HTML
-
JSON Layout for Content: a special layout type for Engage that automatically includes any attributes associated with a piece of content.
-
-
Choose a Content Type: (Not available for JSON layout content)
-
Recommendation: shows recommendations
-
Promotion: shows a RichPromo creative
-
Advertisement: shows a RichAds creative
-
-
Click Add Layout.
-
Use the search box in the top right corner to find your layout in the list page, and click Edit to set it up.

-
Layout Editor: Set up the layout. Click Save to publish to integration.

-
Layout Designer: Set up a visual layout. The layout designer dynamically populates a preview of the layout as fields are added. Click the Container tab to start setting up the components of the layout. Hover over the fields to learn more about each option.

-
-
Scroll down to the Preview section. You can select how many items to return, regions, and the strategy to use. Note that it may take a few minutes for the components to appear in the preview.

-
Add more customizations in the Item tab. The available elements are text, image, price, and add to cart (you can only configure two for a single layout). When you click on one of these options, you can begin customizing the cells and see the preview dynamically change with your entries.


-
Once the layouts are set up, click Save in the top right corner and navigate back to the Layouts page.
JSON Layout for Content
-
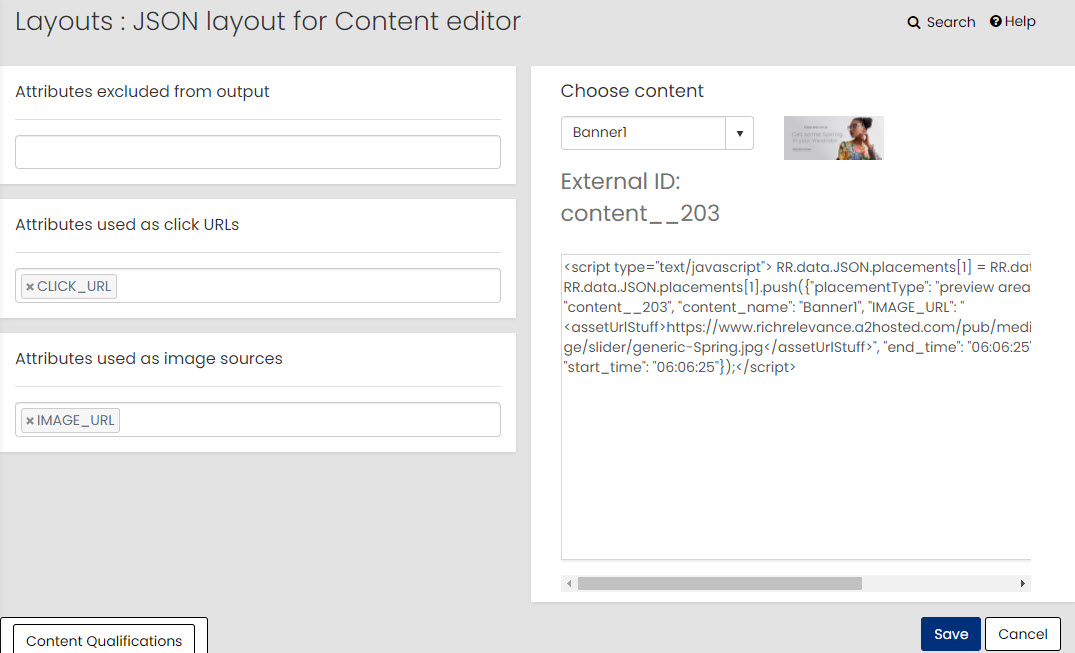
JSON Layout for Content: a special layout type for Engage that automatically includes any attributes associated with a piece of content.

-
Specify which attributes will be excluded from the output (if necessary).
-
Specify which attributes where the asset pattern should be applied. Special handling is utilized to the attribute value to ensure proper asset URL formatting.
-
Specify which attributes where the Click URL logic pattern applies. Special handling is utilized to the attribute value prior to rendering, to ensure that clickthrough URLs are properly formatted. All other attributes will be included into output JSON as is.
-
Select the content on the right side of the window to preview the JSON.
-
To add or edit Content Qualifications, click the button at the bottom left of the window.
-
Click Save in the bottom right corner and navigate back to the Layouts page.
Publishing Layouts
-
Find the layouts in the list. Unpublished layouts are denoted by a green bar. Click Publish to individually publish the layout, or click the Publish all button at the top of the page.
-
To save and automatically publish traditional layouts to integration, click save in the layout editor. To publish to production, navigate back to the Layouts page and click the Publish button for that layout.
-
To publish layouts created in the layout designer to integration, click save in the top right. Navigate to Admin -> Publishing. To publish to production, navigate back to the layout list page and click the Publish button for that layout.
Editing or Deleting Layouts
-
Click Edit to modify the layout settings. Click Delete to remove the layout.
-
A layout cannot be deleted if placements are associated with it. You have to remove placements in order to delete a layout.

Color Key
-
Orange: Modified, unpublished
-
Gray: Deleted, unpublished
-
Green: Added, unpublished
